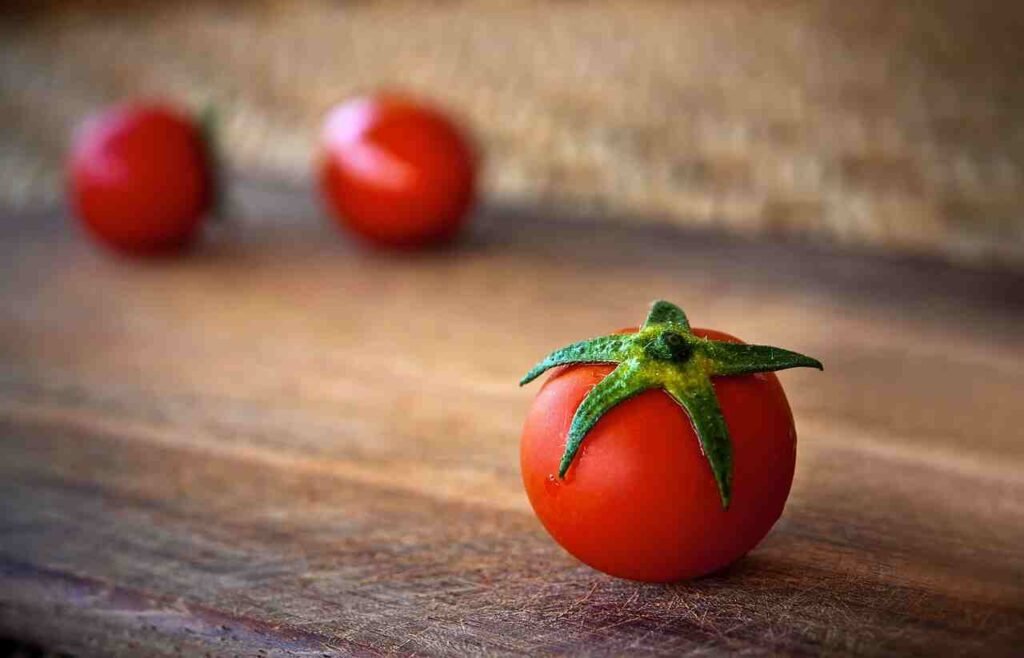
Tomatoes are the single most popular backyard garden vegetable grown around the world. They’re super easy to grow, they transplant well, and they come in a million different varieties. If you live in a cool climate like me, quite likely your growing season is too short to direct seed Tomatoes right into your garden. You need an edge, and that edge is simply starting your tomato seeds early indoors during the winter. So let me show you the steps on starting your tomato seeds early indoors so that you can give your garden the head start it needs to maximize the production of your favorite tomato varieties. And it starts right now.
Seed Starting And Germination
Tomatoes are the single most popular backyard garden vegetable grown around the world. They’re super easy to grow, they transplant well, and they come in a million different varieties. If you live in a cool climate like me, quite likely your growing season is too short to direct seed Tomatoes right into your garden. You need an edge, and that edge is simply starting your tomato seeds early indoors during the winter. So let me show you the steps on starting your tomato seeds early indoors so that you can give your garden the head start it needs to maximize the production of your favorite tomato varieties. And it starts right now.
Tomato seeds are started indoors purely to extend their growing season. You need to do this in cooler areas where there simply isn’t enough time to ripen the fruit. They’re super easy to get going and it gives the have a garden or something to do during the cold winter months. For starting your own tomato seeds, you need to pick the right container. If your backyard garden has evolved to the next level, quite likely you’ve acquired some of these 10 by 20 professional nursery seeding trays. I’ve been using these trays exclusively for about seven years to start all of my tomato seeds and I’m never going back.
I start by filling each cell loosely with a quality organic seeding mixture. Now sealing mixtures are a bit finer and lighter than your conventional potting soils and they’re designed to maximize germination rate and seedling viability. It really is worth it to get a quality mix to start your tomato seeds off right. After each of the cells is filled, you need to firmly press them down that can pack the soil slightly and eliminate any possible air pockets or gaps. I then finish that off by topping up the soil so that each cell is nice and full.
Once you’ve scaled up your garden to be using things like these seedling nursery trays, your seeding duties in the winter become not only easier and efficient but also more organized and effective. As with most things that are just starting out, you’ve got a water from below. This is to protect the integrity of the soil in each cell. I pre-soaked my trays with about two liters of water and I let that sit for about two hours before I start to seed. The amount of trays you can get going and thus the amount of seeds you can start in a short period of time or the small amount of space is astonishing. It’s really easy to see why the pros use this kind of a setup to maximize their space and efficiency.
We’re now ready for the final step and that’s to actually seed our tomato trays. If your space, time, and soil are unlimited, the conventional method to seeding these trays is to simply place one tomato seed in the middle of each cell and once that’s done push each seed down about one to two centimeters below the soil surface. After you’ve done that cover up each hole by simply pinching it closed. This method is perfectly fine provided you have the time and the space. For me here on the farm though, I’ve never had that luxury so I’ve seeded my tomato trays a little bit differently.
On the right, you can see the conventional way of the single seed method. On the left, however, is the other method whereby you actually place multiple tomato seeds in each cell, upwards of 10 to 15 seeds regardless of the variety can be placed in each of the sections allowing you to actually seed up to thousands of tomato seeds in a single tray instead of about a hundred. Obviously the space, time, and soil that you’ll save doing this method is huge and this is only made possible because of how vigorous tomato seedlings are. They are very responsive in a positive way to transplanting and tomato seedlings are usually moved on to the next stage of pot fairly quickly anyway so all of this combined makes tomatoes the ideal candidate for multiple seeding. Don’t just throw the seeds on in a huge clump, you gotta be mindful on the sides of each of the cells and you do have to give a little bit of space to that germinating seed. On the other hand, don’t be too finicky. That’s the goal here is to actually be saving some time and these seeds are pretty tough and easy to germinate. Whichever method you choose is perfectly fine but I do suggest trying out that multiple seeding method as it’s really quite easy. Next, place your seed trays in an area indoors, preferably with an air temperature of about 80 to 85 degrees Fahrenheit. And when seeding multiple trays of multiple varieties of tomatoes, do ensure that you label each tray correctly to avoid confusion. Baby tomato plants all look fairly similar and are very easy to confuse with each other. Cover up each tray with a clear dome to eliminate moisture loss, also to create an ideal greenhouse type environment for maximum germination. These tray domes come in two different heights and you gotta be aware that tomato babies grow fast and it will quickly push up against the smaller lids. As you can see, it’s super easy to start your own tomato plants indoors and completely necessary if you live in a cooler climate with a shorter growing season. Give it a try this winter and get a head start on that garden.
Transplanting Seedlings

It’s entirely too cold to put tomato plants into my garden right now, either by direct seed or even starter plants. Fortunately, about two weeks ago we started early indoors all mine varieties of the heirloom tomatoes that I grow here on the farm. This tomato cultivation articles was dedicated to the setting up, planting, and germination of these tomato seeds early enough so that we get a head start on the season to come. So let’s continue that progress and work on the techniques – moving on these young tomato seedlings into larger pots, either for transition into the spring garden or for sale of starter plants.
Regardless of the variety, I always move my tomato seedlings into the standard four inch nursery pots. These guys fit 18 to a 10 by 20 tray, another perfect blend of saving on space yet giving the plants room to grow. They are a bit flimsy, but I manage to get about three seasons out of each pod before I sell them off with that year’s starter plant sales.
First up, you’re going to want to fill these pots to the top with a quality organic potting mixture, level them off so they’re equally full, and then compress that soil down about 25% to eliminate any air gaps. Then top those pots off again with that same potting mix after you level the pots.
We’re almost ready to plant. We do have to soak the soil with about two liters of warm water for around 2 hours. Now we’re ready to pop. Taking a large screwdriver, make decent size holes in the center of the pot as deep as possible. If you remember , you’ll recall that we seeded in two different ways: one was single seeded and the other was multi or bunch seeded. Let’s first put a couple of the single seeded plugs up to demonstrate how we do it.
Pry out your plug with a flathead screwdriver, being careful not to actually pull on that tomato stem. They pop out really easily this way. Place that whole plug in the hole that you made, planting it as deep as possible. These guys go fast, and you can put an entire tray in less than seven to ten minutes.
Next up, we have the multi or bunch seeded plugs. These are where five or more seeds are packed into a single cell, allowing us to germinate and create thousands of seedlings in a small space. Just like before, use your flat-head screwdriver to lever out the plug, being careful not to yank on those stems. Now most plugs will be populated with multiple sizes and stages of growth, so you’re gonna want to pull out and get rid of the small spindly ones. Think about it, seeds are cheap, and we want uniform growth and even crops, so don’t stress about this part.
Here’s where it gets tricky, and experience and technique tend to take over. Gently pull apart each stem, trying to keep as much of the root system of each plant intact. Only trial and error will give you the confidence on how hard you can actually pull on these guys, so honestly, don’t worry if your first go-around has some sacrifices. Again, place these guys in the holes that you made, pushing them down and planting them as deep as you possibly can. Rework those holes if you have to. The stems can be quite fragile, so it’s much easier to widen a hole than it is to try and jam these guys straight down.
On each seedling, you’ll notice two small leaves at the bottom of the stem. These are actually not leaves at all but vestiges known as cotyledons. I simply pull them off if they get in my way.
So all in all, the bunch seeding does add an extra step to this process, but still, it goes quite quick with a whole tray to here around 12 minutes or less.
You need to plant your tomato seedlings deep. While this goes against traditional planting of young plants, therein lies the singular reason that tomatoes transplant so well, and that’s because of adventitious roots. These are roots that can pop out of anywhere along the stem, well above the root collar, allowing the tomato plant to double its root system in a matter of days. It is because of these adventitious roots that tomato plants are the most popular starters around the world.
Step two of rolling your own tomatoes is manageable and somewhat fun, only because tomatoes are such great transplanters. These guys grow fast, and because we’re growing them indoors, they tend to be a bit floppy. Worse, they’re covered in little hairs that act like Velcro and cause the stems and the leaves to stick to each other like crazy glue. But because they are so tough and durable, they bounce back from virtually everything we do to them. So step two isn’t nearly as delicate and frustrating as it could be.
The last part of the tomato growing series is going to be taking these four inch starter plants, moving them into their final homes into the garden, and setting them up for maximum harvest. It’ll be a really good articles because all the people that simply go and buy their starters in the spring will be able to join in and get value from it. So hey, move those tomato seedlings on now, make sure to plant them deep, and get ready ’cause spring is coming.
Planting In The Garden
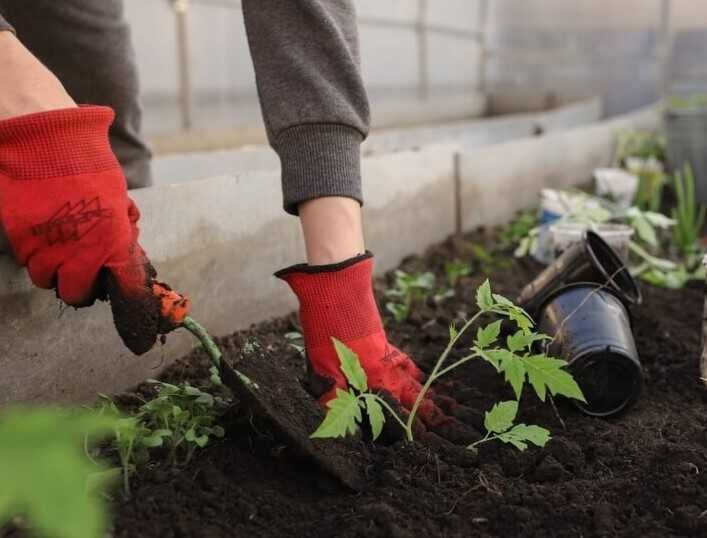
At this point, your tomatoes are more excited for spring than you are. All winter long, we’ve respected the process, we’ve diligently sprouted the seeds of our favorite tomato varieties, moved them along to larger nursery pots, and are now finally ready to get them into our spring garden or in this case, my greenhouse. Hey, let’s take an advance tray of an indeterminate variety of tomato, get them into our spring garden, and set them up for maximum summer harvest.
Preparation: The beds I’m using in this case are six feet by one feet and they’ll fit about six vine tomato plants just perfectly. I do prepare my greenhouse beds a little bit differently than I do the ones outside. I tend to treat the raised beds inside my greenhouse more like a container or a pot. As such, they rarely need to be weeded, and I could dig in the soil or replace the soil completely and freely, just as I would simple pot or containers on my patio. With the soil in them relatively fresh, I can start digging holes underneath each of the wires that I have running to the apex of the greenhouse. Tomatoes, particularly indeterminate tomatoes like these ones, should be planted as deep as possible, so don’t be shy about digging that hole, even a foot down. Once I’ve dug all my holes, I then fill them with water, especially with soil as dry as this is.
Planting: Now we’re ready for planting. Begin by taking your tomato starter plant in one hand, with your other hand over the top of that pot, straddle the plant stem with your index and middle fingers. Unless it’s completely root bound, that plant should pop out quite easily. I then place the plant in each of the holes that I made. With all the tomato plants placed in each of those six holes, I can now begin to fill in and around them with a quality organic potting mix. Remember, fine tomatoes cannot be planted too deep, so don’t skimp on the potting mix..
Now, a note on why we’re planting these tomatoes so deep. Tomatoes, and pretty much all nightshades really, have the ability to send out roots right from the sides of their stems. We call these appendages adventitious roots. This ability to root up their stem is the singular reason that tomatoes are such an amazing transplanter, and we need to use this to our advantage, particularly in the case of vine tomatoes, to maximize the results this summer.
Mulch: With your bed fully planted, the temptation would be to water the plants right away, and while we will need to water this bed eventually, there’s still one more step that we need to do. We need to cover our beds with a thick organic mulch. This can be shredded leaves, shredded yard trimmings, or even straw. For my beds , I wanted to add a little bit of a nitrogen boost to the soil, so I’m using green grass clippings. The green blades of grass will shed nitrogen back into the soil, providing nutrients for the future. Lay that mulch on thick, anywhere from two to four inches should suffice. Having a mulch layer is essential to a healthy garden. Mulches prevent moisture loss, they moderate extreme temperatures, and they keep that top layer of the soil bioactive and full of life. And in the immediate case of this bed, it allows us to water the plants without blasting that soil everywhere, undoing all the work we just did.
Before I go ahead and water, I usually fasten the tomato plants to those wires that I have installed using twist ties. This will be an ongoing process throughout the life of the plant, but I do like to get them secured before blasting them with water. Vine tomatoes are quite easy to tie up, and it just makes sense to get these guys secure before watering them.
You’re gonna want to water your beds deeply and thoroughly. In the case of tomatoes, tomatoes are the most popular starter plants around the world, and for good reason. Everyone loves at least one product that a tomato makes, if not the fresh version itself. Hundreds of varieties are available in every shape and color imaginable, and last but not least, they’re by far the easiest starter plant to work with.
Using the steps that I’ve outlined in this articles, you’ll be growing tomato plants of astonishing proportions. You can quite literally create your own tomato jungle.