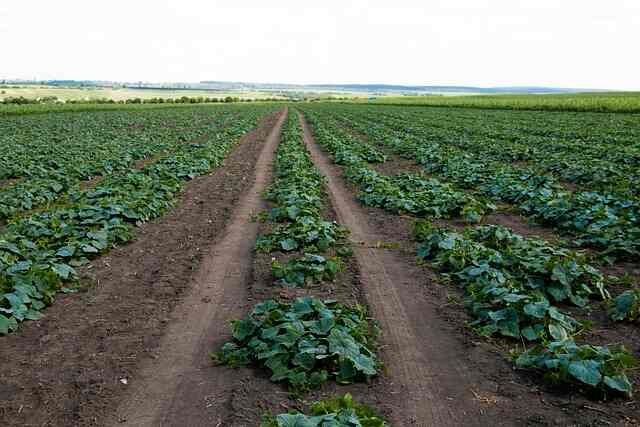
Cucumbers are one of the most prolific vegetables you can grow, and a freshly picked garden cuke has to be the crunchiest, juiciest thing you could possibly enjoy. So let me share with you what I’ve learned over the years, including when and how to start cucumbers, the best supports to use, the one thing you can do to guarantee exceptional growth, and my secret to cracking fruits every time.
Choosing a Variety
Like many warm-season crops, there’s a wealth of cucumbers to choose from. You’ve got gherkin types with smaller, firmer fruits that stand up well to pickling, slicing cucumbers ideal for salads, snacking types for the lunchbox, and quirky customers like lemon-shaped yellow cucumbers. Most varieties are vining, but there are compact, bushier types perfect for growing in containers. There are cucumbers ideal for growing in the greenhouse or a tunnel, outside cucumbers, and modern breeding has even produced varieties tolerant of cooler summers, perfect if you’re in a decidedly iffy climate like mine. But here’s my first pro tip: pick a variety that is going to make life easier for yourself, and there are two ways to ensure this. The first is to pick a variety that has at least some resistance to common diseases like powdery mildew or cucumber mosaic virus. Second, opt for a “parthenocarpic” variety. This mouthful of a word describes fruits that don’t need to be fertilized in order to set fruit—no bees required. Fruit set is guaranteed, and because no fertilization has happened, there are no seeds. So a lot of the commercial cucumbers you get don’t have any seeds in them, so these guys will also be parthenocarpic. Most parthenocarpic varieties are also gynoecious, meaning they produce mainly female flowers. And because it’s the female flowers that swell to produce the fruits, that can only mean one thing: more fruits to pick for us! Now if you see a variety described as all-female, well, that will be gynoecious and almost certainly parthenocarpic as well. Goodness, we’re learning some quite complicated words today! These varieties are hybrids, meaning that two parent varieties have been crossed to produce them, so the seeds can be a bit on the pricier side, but the reliability and performance that they bring more than compensates.
Growing Cucumbers
Cucumbers grow astonishingly quickly, and in ideal circumstances can go from sowing to the first picking within 2 months, so there’s no real rush to sow them. I tend to sow mine about three to four weeks before my last frost date, and if you’re not sure when yours is, well, you can use the Garden Planner to look that up, and I will pop a link to it down below so you can enjoy a free trial and find out. As mine are destined for the greenhouse, I can bag myself an earlier start. But do bear in mind that cucumbers prefer nighttime temperatures above 50°F or 10°C and daytime temperatures a lot warmer than that. So cucumbers are a warm-season crop that doesn’t like it cold. Now I’ve got my seeds here, and they’ve been soaking overnight in lukewarm water. So I just have to drain them off now and then give them a bit of a rinse, just to kind of remove any inhibitors or toxins on the seed coat, just so they’re ready to sow. Soaking like this helps to prime the seeds ready to germinate. It buys us a little bit of a head start. Now once you’ve soaked them and drained them off, get on and sow them straight away, because these guys are now primed and ready.
Sowing Seeds
Right then, let’s get and sow them into their pots. Now you can use small pots like this or chunky plug trays like this, but I prefer to use the pots. Some people sow two seeds per pot and then just pull out the weaker seedling to leave one in each pot. However, given the price of the seeds, I prefer just to sow one seed into a pot, and then if one doesn’t come up, well, that’s no big shake. So just make a little hole with your finger, down to a depth of about half an inch or 1cm, and then simply pop your seed in like that, and you’re good to go. And of course, we’ll need to label these pots so we don’t forget what we have sown. Seedlings pop up so much quicker when they’re warmer. Now the ideal temperature range for cucumbers is around 70 to 80°F, which is 21 to 26°C. It gets nowhere near as warm as that in here, so what I’m going to do after watering them is bring them inside to germinate. Now you could have them on a warm, sunny window sill, or, if you’ve got a heat mat, pop them on there because the gentle bottom heat will really warm up the potting mix in record time, and you’ll get super speedy germination. That’s what I did with an earlier sowing, and they came up within two and a half days, so there you go. I’ll keep my cucumber seedlings on a warm, sunny window sill, then bring them into the greenhouse once it’s not too cold, bringing them back inside if a really chilly night does threaten. If seedlings fill their pots before it’s time to plant, like this one here, then you can just pot them up into a slightly bigger pot and keep on doing that until it is safe to plant them outside or wherever you’re planting them. In warmer climates or when spring tips into summer, you can sow cucumbers directly where they are to grow, but sowing into pots like this offers a few advantages. It enables an earlier start in a cooler climate like mine and keeps the delicate seedlings safe from pests like slugs and cucumber beetles. So while it does add an extra step to the whole process, it ensures against disappointment.
Planting
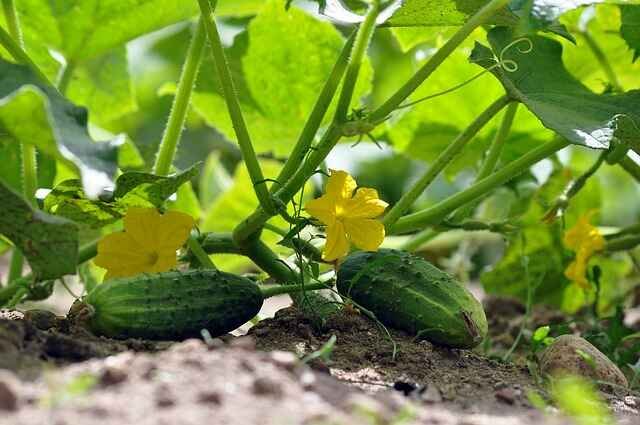
Ideally, we want to plant our cucumbers outside during a spell of milder weather and most definitely after the risk of frost has passed. But before then, we need to harden off our plants by acclimatizing them to outdoor conditions. What I’ll do is I’ll just leave my plants outside somewhere nice and sheltered like this for increasingly longer over the period of a week or so. So maybe an hour or two on the first day, a few hours more on the second day, and so on until it’s time for the big day. Mine will be staying in here, where it’s a little bit warmer. Now cucumbers put on lots of vigorous growth, so to support that we need rich and fertile soil. So I’m just spreading a little bit of really, really well-rotted manure here. Now this has been sitting around for about a year. You wouldn’t want to put it as fresh as this, but because it’s nice and old, it’s as good as nice crumbly compost, so it’ll be fine for our plants. Just get that spread in, ready for planting. I’ll probably plant in about another week or possibly two, depending on the progress of spring. And then for an extra little boost, why not, because I’ve got it, a few chicken manure pellets. I’m just going to scatter those in, and we’ll just tickle those in as well. It’s got a real distinctive smell, but, well, it’s all good stuff. If it smells bad, you know it’s usually probably good for the soil. The best results are had when vining cucumbers are trained up off the ground. This reduces the pest risk and improves airflow around the plants, so there’s less chance of disease too, and they’ll be growing up into the sunshine, which will help to fuel all of that prolific growth. For vining cucumbers like the ones I’m growing, the simplest way to support plants is using sturdy string secured at the top to a kind of horizontal wire. You could also use trellises or A-frame style supports, but I love how easy string supports are to set up and manage. When it’s time to plant, I’ll soak the root balls for an hour or so and then dig my holes, carefully remove each plant from its pot, and then the strings can either be loosely tied to the base of the stem, or, my preference, looped beneath the root ball as it’s planted, to hold it in position. Handle plants with care, as the roots and stems are very delicate and can easily snap. I space my plants between about a foot and 18 inches apart, which is 30 to 45 cm. This makes the most efficient use of space. So long as plants are properly supported, pruned, and watered, you can get away with this fairly close spacing.
Watering
Cucumbers put on a lot of growth, but famously, they’re full of water. The fruits are about 96% water, so the one thing you can do, the biggest tip of all, to encourage vigorous growth in lots of these things is, of course, to water really thoroughly. So check the soil often. Push a finger down where they’re growing, about an inch or so into the soil, and check it. If it’s anywhere near approaching dry, get on and give everything a really good deep water to keep things quenched. When you water, try to avoid splashing water onto the lowest leaves, because that can create moist, humid conditions and the potential for disease. Once things really get growing, it’s worth applying some sort of mulch, something like dried grass clippings, hay or straw, bark chippings, more compost, anything like that, just to kind of shade the soil and keep that moisture locked in. Well-prepared soil will get your cucumbers off to a flying start, but as they begin to fruit, it’s worth going in with a liquid fertilizer that’s high in potassium to encourage more of those flowers and fruits to form. So something like a liquid tomato feed, or you could even make your own liquid fertilizer from things like nettles or comfrey leaves.
Harvesting
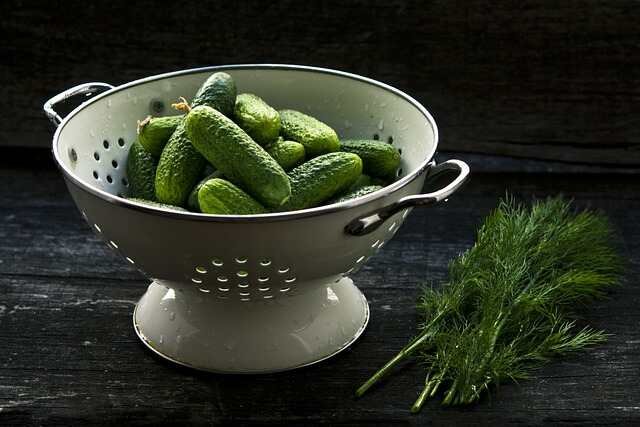
You can tell when cucumbers are ready because they will appear plump, smooth, and firm. This guy here looks perfect, so I’m going to go ahead and cut him off. Now there are certain cucumber varieties, which I haven’t got here, that have tiny little spines along them. That’s a sure sign that they’re good to pick, because as the fruits get older, those spines rub off, and if they’re past it, they’ll just have completely smooth skins. But most varieties are smooth like this. So, just take your sharp knife or scissors and cut the cucumber away from the plant.It’s best not to pull them away, because you could end up damaging the stems.Check your plants every day because they can grow really quickly. You don’t want to miss any and let them get too big, because that can stop the plant from producing more flowers and fruits. So keep picking, and you’ll keep producing more cucumbers. And there you have it, a bountiful supply of fresh cucumbers ready to enjoy throughout the summer months.
Happy growing!