I think it goes without saying that I absolutely adore plants, and today I’m gonna be making some new ones. I’m propagating some plants, and I thought I’d bring you along and show you how I do it.
So propagating plants is just the process of creating these new baby plants out of some existing mature mama plants, and it’s just a really easy, affordable way to fill up your house full of plants, just based on what you’ve already got. You don’t necessarily need to go and buy anything. One of the other reasons I do it is it’s just such a rewarding feeling to see that you’re kind of creating this new life, you know?
So I’m gonna tell you how I propagate five of my favorites. One of them is pothos, which is the one you see here and hanging behind me in the kitchen. The other one is the monstera, monstera deliciosa, with its big beautiful leaves. I’ll also show you how to propagate the pancake plant or the pelléas, and a couple of others as well.
. For now, we’re gonna get started on propagating some plants.
Pothos (Epipremnum aureum)
The pothos is probably my favorite plant. I think it looks so beautiful the way its water falls out of a pot if it’s hanging on the ceiling or the way it cascades down the side of a surface, so I’ve got this pothos here and it’s beautiful. But it’s getting really long and it’s hitting the ground, so it needs a trim, and the lovely thing is we can use the trimmings to create a new baby plant.
So all I’m gonna do is I’m going to cut the vine just at a point below where a leaf is coming out of the vine. So I’m just gonna snip it like that, and you don’t need to worry about the fact that you’ve just made this incision, a new little vine or piece is gonna stick out from here and grow, and it’s gonna hit the ground again within a few months. So we’re gonna hang on to these trimmings, and I’m just gonna continue this all the way around the plant.
The first thing we need to do is find the nodes on this vine. I’m gonna show you how to do that. It’s really easy. It’s pretty much just any point where a leaf is coming out from the vine. So this here is a node. This is a node. So what we’re gonna want to do is take some sharp scissors, a knife, and we’re just gonna make a cut about one centimeter on either side of a node like so, and we’re gonna repeat this all the way up the vine, one centimeter on each side. And any little bit of vine that we cut that was just these pieces here, we actually don’t need these; we’re just gonna put these to the side.
These cuttings are what we’re gonna put in water.That’s actually very likely where the roots are going to pop out from once we put this in water. So now that we’ve got all these trimmings, all we need to do is dunk it into some water. You want to make sure that those nodes stay submerged because like we said, that’s where the roots are coming out from.
And then comes arguably the hardest part, which is to patiently wait for these to root, which can take anywhere between two to four weeks. Now one really important thing in that time is you want to make sure that you’re topping up your little vessel, your cup, whatever you’re using with water because you’re gonna notice those water levels are starting to drop as the plant is using it up and as it evaporates. And maybe even more important than that is about once a week you actually want to completely dump out the water that’s in here and fill it up with some fresh water. The reason for that is tap water has some oxygen in it and roots of plants need oxygen in order to grow; they’re living things just like us.
And then in terms of where to store it, you just want to put it somewhere that has a good amount of sunlight and somewhere that’s preferably a little bit warmer, so maybe keep it away from window sills because that’s a lot of fluctuating temperature. Potting the pothos is actually really straightforward once it roots; about two centimeters or an inch are good to go. I put this in water probably at least three or four months ago.
So if you don’t have time to put it in soil or if you even if want to just keep it like this because it looks decorative, you definitely can so long as again, you’re replacing the water to keep it fresh. But you can see these roots have actually gotten longer than they need to be. You only need a couple centimeters or so. So what I’ve got here is some soil, and I like to moisten it first by adding some water to it before we transplant our cuttings into this soil.
Because you got to keep in mind that the pothos just came from being in a water environment for quite a while, and so they’re gonna want the soil to be moist, not wet, but just moist enough that it kind of sticks together. So once you’ve added some water, just get in there with your hands, give it a mix, and once you kind of get it to that point where it’s it sticks together a bit, it’s good, it’s ready to use.
And then the only other thing that you’re going to need is an inner pot that has holes on the bottom, that is incredibly important that it has holes because when you’re gonna water your plant later, you want it to be able to drain the water out so that the roots don’t rot. So all I’m gonna do now is I’m gonna transfer some of that moist soil into this inner pot, and now I’m gonna take this plant that has a lot of roots, I’m actually gonna cut it because I don’t think it needs all that much root and it makes it easier to plant. I’m just gonna cut it to make the roots about an inch long, and then we’re gonna put that into the soil.
So I’m using a four-inch or ten centimeter pot here, and I’m gonna plant about somewhere around ten, maybe fifteen of these cuttings into the soil. Not all of the cuttings are gonna take, some of them might die, there might be some casualties, that’s okay. It’s still gonna grow into becoming a beautiful, luscious healthy plant.
And then we’re gonna pour a little bit of water on the soil as well, and for the first couple of weeks, we want to try to keep that soil moist to promote the roots to continue to grow and just get used to their new environment. And that’s pretty much it, you’ve made yourself a little baby pothos plant and within a few months, hopefully, and I’m sure you’re gonna have a lot of success with it, it’s gonna go great. You’re gonna end up with a plant that’s gonna grow its own vines and become its own mom at some point that you can trim because it’s becoming so long. And that’s it, that’s how you make your own pothos at home.
String of Hearts (Ceropegia woodii)
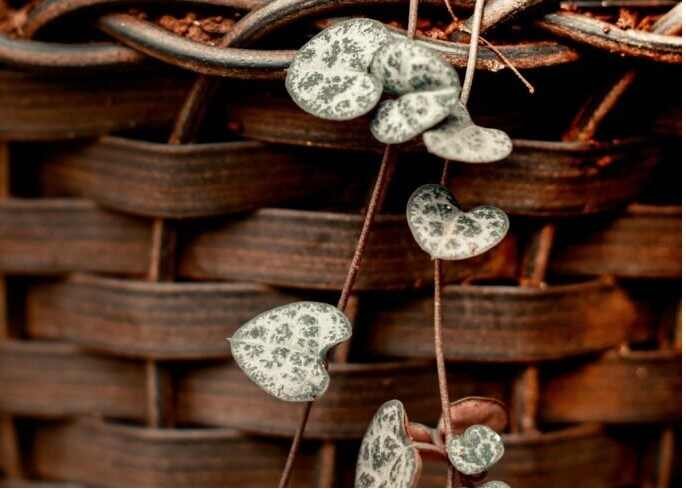
Now that we’ve propagated the pothos, this part is gonna be a breeze because you understand a lot of the key principles. So we are now gonna be propagating the string of Hearts, which is such a beautiful delicate plant. So in much the same way as we did before, we are going to take one of the vines from the mother plant and we are going to give it a snip on the vine somewhere around the halfway point.
Now what we could do is we could just put this straight into the water. The node again is where the roots are going to come from. But if we put this in the water, the node in the water with the leaf, with that leaf being submerged, that’s actually going to rot. So one of the major or main differences here is we actually want to take that leaf at the node and just pluck it off. And so then we’re creating a little naked node, and that’s what we’re going to dump into the water. And what I usually like to do is keep about two nodes worth here attached, and then I give the vine another snip, and then we are going to find another node.
Before we submerge it in the water, we’re going to pluck off these leaves to create a little naked node, and we’re gonna put that in the water as well. Again comes the part of being patient, so wait about three to four weeks for this to root, but if I can be honest what I actually like to do sometimes is to just keep it in the decorative glass jar, vase, or whatever you’ve got because I think it looks really pretty when you put it on a shelf like this just even in solitude, it looks really nice.
But if it does start to root and you’re ready to put it into a pot, if you take a look at this one for example, I’ve had this sitting in water for I think a couple of months now at least, and once it starts to show you roots like this, you can put it into a pot. Make sure again it has some drainage holes. Make sure that for the first week or two you’re keeping the soil moist just like we did before; it came from a water medium, it needs to acclimate to being in soil again. But after the one or two weeks are up, really taper back on how much you’re watering this because it is a succulent after all. Actually so you don’t want to over love it because you could risk losing it in the process.
Monstera deliciosa

The following plant that we will proliferate is the monstera deliciosa, which I believe is simply so lovely, and perhaps this is on the grounds that it’s ascending in fame, yet I likewise observe this to be an especially costly plant, yet assuming you’ve proactively got one of these at home you can make more from it, and I will show you how. The central thing about the monstera is that you truly need to know where to cut, and the hub on this specific plant is where you see two stems emerging from a solitary intersection. The alternate way you realize that that is the hub is that regularly there’s a root previously emerging from it, and on the monstera, this is known as the flying root.
There is a hub, however this here is likewise a hub since two stems emerging from that too. Furthermore, this one has a seriously huge ethereal root. So what you for the most part believe should do is make a cut around a couple of centimeters underneath the hub so you can decide to do that possibly some, I will pick one. So around a couple of centimeters underneath ensure you have truly sharp scissors.
There we go, so this huge piece I’ve recently cut off. So we have three stems and three leaves now. There’s two choices with this as far as how you can proliferate, one of them, and likely the one I really utilize on a more regular basis, is to set it on the right track into a major jar of water and afterward stand by till it gives you a few roots and afterward relocate it into soil. But since we’ve previously done that two times, I will show you another way that you can spread this which is to engender by setting it on the right track into soil, which is a wonderful choice to hang tight for it to root.
Considering that this as of now has a few ethereal roots you can just place these straight into the dirt. Presently these flying roots are somewhat longer than I maintain that they should be so I’m feeling free to give these a tad of a trim, and it’s anything but no joking matter since they will recover in the future. When they’re in the dirt, so I will cut it here, and I will cut somewhat not too far off.
So presently we’re about to take a pot once more. Continuously ensure that the pot has seepage openings, that is truly significant, and we will add to it some pre-dampened soil. Furthermore, presently what I will do is I’m about to make a huge well in the focal point of the dirt so we can place our cutting into the dirt. I will place the principal hub in and simply wrap up that flying root.
What’s more, a little ethereal root here. In the long run that will turn downwards, and it will develop into the dirt getting it much more that will happen normally. You don’t need to do anything for that. That is essentially it. This is truly simple. I’m about to place it into a pleasant embellishing external pot, and Monsteras really do like a ton of water so you can make a point to add a tad of water on top. Also, that is basically it. That is the manner by which you spread or one of the manners in which that you can proliferate a monstera deliciosa.
Hotcake plant (Pilea peperomioides)
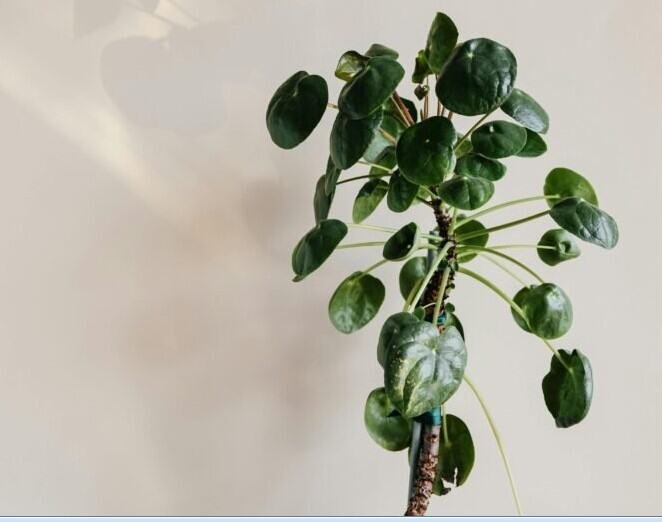
So the pilea or the flapjack plant is the one that we have effortlessly spread the most I think we began with two of them, and somewhat recently, we’ve made twenty from those two. So obviously, it’s really clear, quite simple to do. It will be somewhat unique in relation to every one of the spreads we’ve done before in that you don’t have to search for any hubs. Rather what happens is you have your experienced mom plant here, which used to really be a child. Be that as it may, what it will begin to do is it will pop off these little children, you will see them sort of coming up in the dirt by and large around the mother plant.
And afterward what we will believe should do is delicately we will pry off one of the infants. Attempt to keep a smidgen
. You needn’t bother with a ton, however attempt to safeguard a smidgen of the roots there. In the event that it’s not chaotic, you’re not getting everything done well. Okay, and afterward you’re about to relocate this into some sodden soil.
Presently assuming it happened that you coincidentally cut this off and you got no roots in it by any stretch of the imagination, no real reason to stress. You can simply plug this into some water, and these affection water they can live in water very much like the plants we’ve seen that have preceded it. So let me show you a model here. So this here is a pilea that I simply have hanging off of something, and I think it looks truly lovely, however it’s really not in soil. It’s lowered in water, and check out at that lovely root foundation that it makes. So you can keep it in water insofar as once more, you’re keeping it bested up and new. In any case, assuming that you truly do figure out how to – and I think this is only the simpler method for making it happen – assuming you really do get one of these children with roots unblemished you can relocate it straight into some dirt, and afterward you’re about to make a little well and placed that child in there.
Push it down close it up, and that is essentially it. So this child, in all honesty, about a year prior, that is what this mother resembled that way, thus it’ll develop and ideally give you a few additional children and very much like human infants. They need a ton of consideration to start with, so save the dirt wet for the a long time, and afterward you can tighten it back, and I simply feel like flapjack plants particularly make for the best gift.
So we’ve given an entire pack of these away, and it’s in every case truly fun when you go to someone’s home or office and they’re similar to look take a gander at how my flapjack plant is doing, and it’s truly ideal to see that you’ve gotten them amped up for plants as well. So that is the way you proliferate the most simple method for spreading hotcake plants.
ZZ plant (Zamioculcas zamiifolia)
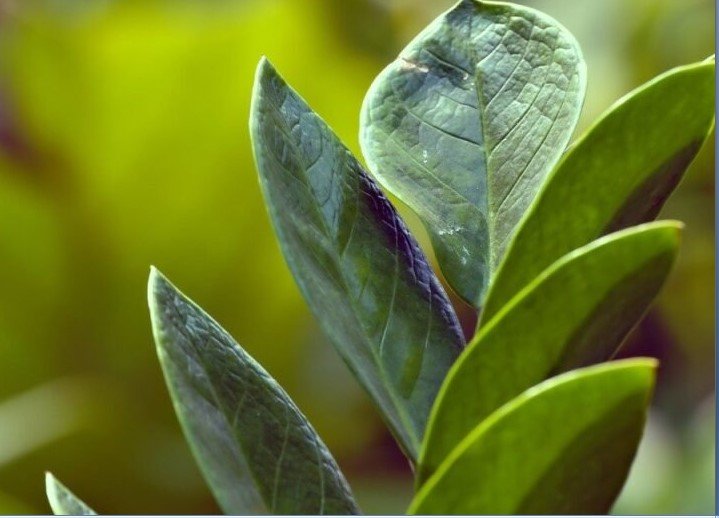
So the last plant that we will engender is the ZZ plant, which is this delightful lavish plant that is got these truly thick stunning green leaves. It’s a great plant for any individual who’s a fledgling since it can sort of endure low light circumstances or on the other hand assuming you disregard it, not that I’d suggest ignoring it. In any case, on the off chance that you realize you miss a watering or even two or perhaps three, it’ll truly do fine and dandy for the most part. So with regards to spreading this plant, there’s maybe a couple ways. I will educate you regarding one, I will show you one.
One strategy is that you can just remove it, cut one of the stems from the base and when you do that then you could simply plunk it in a few water and it’ll at any point develop a few roots and afterward you can place it into some dirt. We’ve previously done that previously so I won’t tell you the best way to do that at this moment. In any case, the second way that you can engender this plant is through a cycle called division.
So the plant develops from these thick bulbs just under the dirt called rhizomes, and these rhizomes really hold some water, which is the reason the plant can endure a tad of disregard in the event that you miss watering it. So all we need to do for this situation is you delicately need to play a tad of a back-and-forth. There we go, I have one here. So to do. You need to ensure that you get a portion of the roots a couple of the rhizomes at any rate, a few stems, and a few leaves, and that is all there is to it.
So not surprisingly, we’re snatching an inward pot. I will add to it some pre-saturated soil so I will establish this in there like so. That is another new soil on top, just to cover those rhizomes once more. They need to be under the dirt. So now that all plants I’m about to place it in this external pot only for enhancement. Really! I will give it somewhat more water, and afterward after this, we’re about to need to put it some place where it has some backhanded light and ensure you’re equitably watering it throughout the following little while it’s recuperating, and afterward at last you will see it will shoot out these sort of little child stems and new leaves which you can tell since I truly like green tone and that is the way you make a little multitude of these.
Conclusion
So these are them these are the five plants that we’ve propagated together today. Hopefully, it’s a fun little activity something that you can do from home. And this is also the perfect time of year to get started here at spring and the days are getting longer, and then the days are warmer and so you can see the roots start to grow faster your plants growing quick and you see the fruits of your labor sooner, and I think it also just gives your plants a better chance for success when you’re propagating them in this time of year.


