Wonderful beans! Staggering, simple to develop, and gladly gigantic — what a champ. We should find all you really want to pick amazing units each opportunity since here comes our bean developing masterclass.
Do you know these guys? All things considered, this is essentially everything you’ll track down in the store for a large part of the year, however like such countless different yields, develop them yourself and you’ll have a lot more to browse. Naturally, beans can be preserved in a variety of ways, including freezing, canning, and dehydrating, so you can enjoy them year-round.
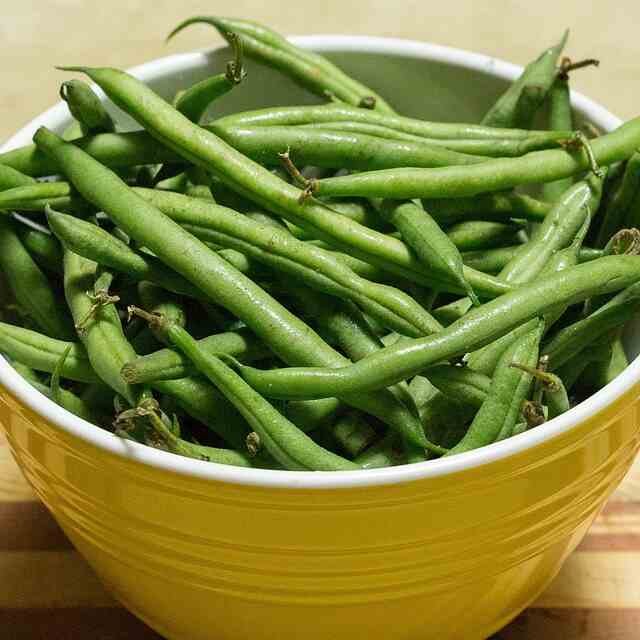
Our standard green beans, also known as string beans, snap beans, French filet beans, or fine beans—you name it—are what we have here.
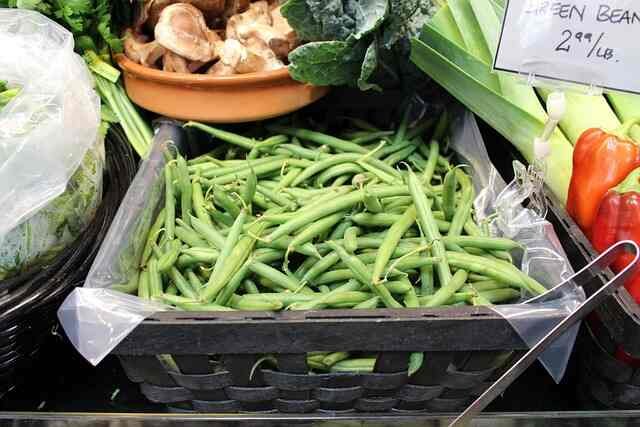
Presently, they’re for the most part reaped very youthful before the beans inside have enlarged, and they have that satisfying snap to them also. They are open minded toward blistering climate, so these are perfect for hotter environments.
Then, at that point, there are the level or Romano beans, which incorporate sprinter beans. Presently, these folks are perfect for cutting up as a steaming hot backup to pretty much any feast. They for the most part yield more than your normal green beans on the grounds that the cases are that a lot greater and in this way heavier, and they are an extraordinary decision for places with marginally cooler summers, yet they can battle when it gets truly sweltering.
These beans, like the stunningly speckled borlotti beans or French horticultural beans, can be harvested young to eat whole with all of the pods, left to dry out so the beans can be shelled, or left to dry out so you can eat them over the winter. There are yellow wax beans, shocking purple beans brought into the world on purple-touched plants, and an entire host of splodged, splattered, or spotted cases that truly jazz things up in the nursery.
Presently I some of the time keep thinking about whether there’s simply a lot of decision. On the off chance that you’re battling with that, take a stab at limiting it down to these All-America Determinations and RHS Grant of Nursery Legitimacy victors. These are delicate, stringless beans that truly are the crème de la crème of all beans.
I love climbing or post beans. Besides the fact that they add important vertical interest and subsequently show to the nursery, yet the honey bees totally love them as well, particularly my outright #1, sprinter beans. The genuine selling point for climbing beans is the manner by which productive they are for the space that they possess in light of the fact that these folks grow up as opposed to out. All things considered, they pack a ton in, whether that is growing up a teepee structure, a vegetable bean curve like this one here, or as a sublime mass of beans, and they keep on endlessly blossoming and delivering those units the entire summer insofar as you continue to pick them.
Bush or dwarf beans, on the other hand, grow really, really quickly, so they’re ideal for people with a shorter growing season. Now, these tend to produce most of their pods all in one go, and that’s really great if you want to, say, process your beans all at once, but if you’re after a more steady production, then you’ll need to resow them every now and then to keep the pods coming. The biggest appeal about them, as far as I see it, is that they don’t need any support—you just sow them, water them, and then pretty much leave them for two months, and then they’ll start producing with little extra input from you.
Today, I’m going to be planting up my bean arch, starting with this arch here using these young runner bean plants I started from seed a couple of weeks ago. Now, these guys very first popped up on Thursday. Today’s Monday, so that’s four days worth of growth. Just wow! It’s as if they can’t wait to get started and growing up.
So the first job is to just enrich the soil with some organic matter. I’ve got this lovely well-rotted manure here; you could also use garden compost, for example. Another option is to dig what’s called a compost trench or pit. You just dig a trench where the beans are going to go to a depth of around a foot, then add compostable materials such as kitchen scraps into the bottom before covering it over. Now, do this in the autumn or winter, and then by spring, when you come to plant your beans, you’ll have a lovely cushion of richness there for the roots to grow down into.
Beans also like it nice and sunny. I would say a minimum of six hours of direct sunshine is ideal, though if you are in a really hot climate, a little bit of dappled shade would do no harm. Now, I’m quite up close against my fava or broad beans here, but I’m not too worried about that. The climbing beans will quickly grow up and out into the sunshine, and they can grow into this space here, so they’ll soon be out and away from these fava or broad beans.
Now, you’ve probably read those kinds of articles of beans spiraling back and forth, flipping about as they try to sort of search for those supports, and these guys will certainly do that. But if they get a bit bigger, I can always kind of twist them on and help them onto the trellis here just to kind of help them find their feet. We all need a bit of a helping hand from time to time.
In an ideal world, beans are best sown direct against their supports where they are to grow because transplanting them can sometimes damage the roots, and they obviously don’t like that. However, I wanted to get a nice head start away from the slugs in what has been an incredibly wet spring. So these guys were just sown into plug trays into an all-purpose potting mix about an inch or 2 cm deep, and then grown on in the greenhouse and then brought out now ready to plant with the weather really improving. There’s talk of temperatures in the high 60s or around 20 Celsius at the end of the week. Well, I’ve decided to direct sow my French beans or green beans here, and here they are. Just look at these beautiful little seeds. This is what, for me, encapsulates springtime—handling these gorgeous seeds like this and getting them into the ground.
I’ve enriched the soil again here with plenty of organic matter, and just like my runner beans, these French or green beans are going to go down to a depth of about an inch or a couple of cm, and the final plants will be 6 inches or 15 cm apart. But I’m just going to sow them a little bit closer than that just in case some get eaten by the slugs or don’t germinate. They can always be thinned out. And then, just because I’m extra paranoid, I’m just going to sow a few more into a pot here as kind of backups, just in case. Who’s a pretty girl? Yes, right ratty. And now, just to get the beans on our way, our magical beans, let’s give them a really good thorough soaking.
Now, one other thing you could do if it isn’t warm like it is finally now is to just cover the sown area with little bottle cloches like this right the way along to create a miniature greenhouse effect until they pop through. One of the great advantages of bush or dwarf beans is their super speedy turnaround, which makes them really great for fitting in here and there as gaps appear. They’re a great follow-on crop. If you’re following them on from a previous crop, then maybe just fork in some general-purpose organic fertilizer before sowing.
To sow, I mark out my rows to set them a touch over a foot or around 35 cm apart. I’ll then space the seeds 5 inches or 12 cm or so apart along the rows, then follow up and plant them. After a thorough water, it’s a matter of days before the seedlings start pushing through. Dwarf beans can also be sown into troughs of potting mix, making them a great choice for patios, balconies, or even a windowsill.
Bush or dwarf beans shouldn’t need supporting, but if you are in a very exposed location or get those torrential downpours, then, well, you can help them along by just banking up the soil against the base of the stems to offer a little bit of extra support. Just use a hoe to draw up the earth, much like hilling or earthing up potatoes, and that will just stop them from flopping over and the beans dragging in the mud.
Climbing beans, on the other hand, do need proper support. Now, I love my climbing bean arches here. They’re really decorative, and the beans often dangle down, which makes them very easy to pick. However, they are a bit of an investment. An alternative to pre-bought arches is to make your own. So I’ve made arches using this really strong bar here that I’ve hammered into the ground, and then I’ve secured this simple cattle fencing here to the posts using something like zip ties or cable ties, and that has lasted really well. And with the beans growing up it, it creates a beautiful tunnel effect and looks absolutely stunning. A-frame supports are the traditional option, while a teepee of canes or, say, hazel poles offers a more compact solution that’s less likely to catch the wind and get damaged. I reckon bean teepees look magnificent too.
Happy Gardening!