The definition of a weed is a plant that’s growing somewhere it shouldn’t be. But weeds have another side to them and can prove incredibly useful, including turning all kinds of weeds into a free, organic fertilizer to use on any plant, anywhere. So let’s start by looking at the very simplest ways of using plant material and, of course, weeds in the garden: chop and drop.
And it is exactly as it says on the tin. Just gather up your weeds, snip them up into smaller pieces, then just let them fall back onto the ground. By cutting them up into slightly smaller bits, we’re just going to help them break down and get incorporated back into the soil that much faster. Of course, you don’t have to drop weeds back in the same place that you gathered them; any spare piece of ground will do.
Now, a few ground rules for chopping and dropping: do this on a dry day so the weeds don’t immediately root back into the soil. Avoid cutting any weeds with ripe seeds because you don’t want new weeds popping up everywhere, and avoid incorporating the roots of any creeping or perennial weeds. The simplest way to deal with most weeds, specifically annual weeds that pop up, flower, and set seed in the same season, is to use a hoe.

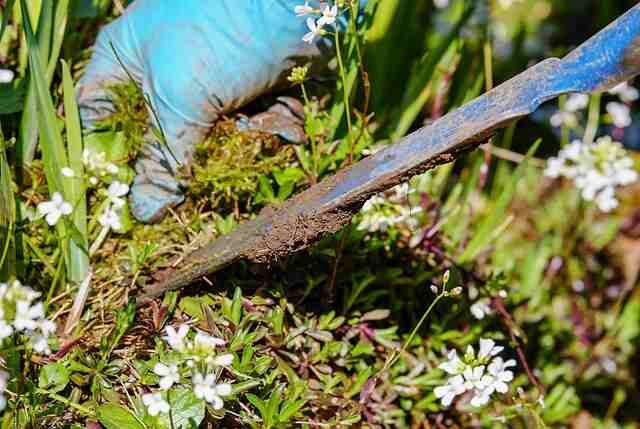
A good sharp hoe will just slice away weeds while they’re still very small, nipping the problem in the bud before it grows out of control. This too is a form of chop and drop. The blade glides through at ground level, searing the weeds in two. The top of the weeds falls back onto the ground and just withers away, while the roots left in the soil will just decompose.

If your garden has more than its fair share of weeds (and what garden doesn’t?), just bear in mind that regular hoeing will help to gradually deplete the weed seed bank that is in the soil, so you’ll gradually get fewer and fewer weeds. And know that just like a purpose-grown cover crop or green manure, the weeds, when they’re chopped and left to go back into the soil, will also be adding valuable organic matter to help improve your soil.
You can also add weeds to the compost heap or bin, and it’s where many of my larger weeds, like nettles, end up. Fresh, green weeds are an invaluable source of nitrogen, making them really useful greens to balance out browns in the compost heap like woodier prunings, fallen leaves, or torn-up cardboard. There are several areas of my garden where the weeds are just let be for much of the time because I haven’t always got the time to keep up with them. But on the flip side, I know I’ve always got a steady supply of compostable ingredients as and when I need them. Again, make sure you’re adding weeds that haven’t got seeds in them and don’t add the roots of perennial weeds unless your compost gets really hot enough to kill them off.
You can chop up your weeds into smaller pieces to hasten the decomposition process. Or, something I like to do occasionally is spread the weeds out and then run the lawnmower back and forth over them to really pulverize them into small pieces, and then add them to the heap, which will really speed things along.
One way to deal with pernicious weeds, especially their roots like the likes of bindweed, is to dry them out to desiccate them in the sun (when it does shine). I like to just spread them out onto a hard surface like paving and just leave them there. It takes time, two or three weeks, but they will give up the ghost eventually, and if it’s in a heavily trafficked area, well, all the better. The other option is to drown them. It all sounds rather macabre, doesn’t it? But by submerging the weeds underwater, they will eventually turn into a sludge, which rather handily brings us onto that free fertilizer I mentioned right at the start of the article.
So far we’ve looked at dropping weeds back onto the soil and adding them to the compost heap to transfer into beautiful compost. But how about turning weeds into a handy, quick-to-make, beautiful, nutrient-rich, organic liquid fertilizer that is sure to supercharge your plants? I’m going to show you two ways to do this, starting with a beautiful weed tea. Now different weeds and plants generally will accumulate different amounts of nutrients of different types in their leaves as they grow. So I’m going to make a general-purpose feed by using a broad range of weeds. I’ve got some freshly cut ground elder here, I’ve got some nettles, and some—what?—grass and all sorts of different bits and bobs in here, including some roots. By combining these, I’ll get a broad nutrient profile which makes a fantastic general-purpose liquid feed.
If you have a specific plant or purpose in mind, you could make a weed tea from just one type of weed to major on a particular nutrient. For example, nettles are quite high in nitrogen, which would make a fantastic feed for, say, leafy plants, whereas something like docks or comfrey tends to have a slightly higher potassium content, which is really great for fruiting crops like tomatoes. Single weed teas kind of feel like a single estate coffee or a good single malt whiskey, doesn’t it? Nice.
Right then, let’s put it all together. So I’m just going to stuff my weeds into my bucket here. Just layer them all up like that, get a nice mix. This has all been a bit chopped up already. I can just kind of tear these up a bit as they go in or just bruise them to kind of get them started and really push it down like this. We want it quite squashed down. Once it’s most of the way full, we can just add our water. Now the best water is rainwater for this, so it’s chlorine-free and won’t affect what’s going on in here. So let’s…there we go, that should do it. So we just want it nicely covered over.
Now we could leave things like this and that would be fine, but if we want to speed things along a little bit more, we can add something else to give it all a boost. You could add a naturally fermenting food like yogurt, but my preference is just to use something from the garden, and that is beautiful, mature leaf mold or compost, just about a handful to add in there as well. What this is going to do is introduce some beneficial bacteria into our brew here. We’re kind of inoculating everything to give it a bit of a kick start.
As our weed tea brews, it can develop quite the pong. You might not mind that, but it is rather strong, so I’d suggest popping on a lid. Now don’t push it down, just put it on loosely like this because as the weeds break down and release their goodness into the water, they will also release carbon dioxide, which can build up. We want to let that escape rather than trapping it and having our lid potentially blow off suddenly. This should take about one to two weeks to fully mature; it’s a bit quicker in warmer weather because the bacteria responsible for making our brew will, of course, reproduce and do their business that much quicker.
If you’ve got really vigorous weeds, then you might want to just leave them in a little bit longer before adding that slop to the compost heap, but the solids can certainly go there. If you look at the color of the liquid, it’s got a really pleasing kind of pond-like pea soup consistency. Great stuff, so let’s use our weed tea. We need about one part of our weed tea to ten parts water. So I’ve measured this out already, I’ve got about just about ten liters or two gallons or so of water. I’ve added a liter of our stuff here. Give it a good mix.
Now this can be used pretty much anywhere in the garden: on ornamentals, bedding plants, container plants, of course in the vegetable garden, or to help young transplants on their way. Now I can leave this, but it’s going to get a little bit stronger, so if you do decide to leave it and use it gradually, maybe dilute it a bit more as time goes on. I can add more weeds and water as I use it or just use it and then start a new batch, making sure I’ve always got a succession of weed tea. And I’ll say it once again, this stuff really is…something special.
Another option is to make a concentrated liquid feed which can be bottled up to use as and when at a later date. Now the most popular of these is made using comfrey, which makes a great feed, of course, for fruiting crops like tomatoes, peppers, and so on. I’m going to make one using this alkanet here, which is very closely related. Just like comfrey, alkanet has a lovely deep taproot, which draws up nutrients from deep down and then contains it within the leaves. And just like comfrey, it’s got real nasty spines on it, so I’m going to use gloves to gather it all up so I don’t irritate my skin.
For the concentrated liquid feed, we need a bucket with some perforated holes in the bottom. I’ve made most here, but I’ll just add a couple more. That should do it. Now if I show you here, we’ve got a whole sort of spray of holes in the bottom, and this will become clear in a moment. Let’s pack this though with our alkanet leaves, but first let’s chop it all up to break down quicker. And we’re going to get them into nice kind of smaller pieces like this because they will slump down that much quicker to make our feed. And then we’re going to fill up that perforated bucket right to the top and we’re going to really pack this stuff in.
Now I’m not going to add any water because this is a dry, concentrated liquid feed. After really pummeling this and bothering it and massaging it all up to kind of break it down as much as we can, I’m now going to add on a couple of weights; something like these bricks will do just fine. That will kind of put, obviously, downward pressure on our comfrey and cause it to slump and collapse down and start oozing out that lovely dark liquid which we will be collecting. We also don’t want any rain to get in; we want to keep it nice and concentrated, of course, so pop on your lid again, loosely is fine, and then I’m going to put it inside this bucket here which doesn’t have any holes. This is the bucket that’s going to collect the concentrated feed, so it’s going to drip out of the holes at the bottom and then collect in the bottom of this bucket. Periodically we can just empty it and collect it into our bottles and keep it going.
The really good news is because we’re not adding any more water to this, it’s a lot less pongy than our weed tea. So maybe use this version if you’re of a sensitive disposition. Because this is so much more potent, I will be diluting this liquid feed about one part to twenty parts of water.
If you’ve got any ideas for using up weeds in the garden, do share them . Happy Gardening!


