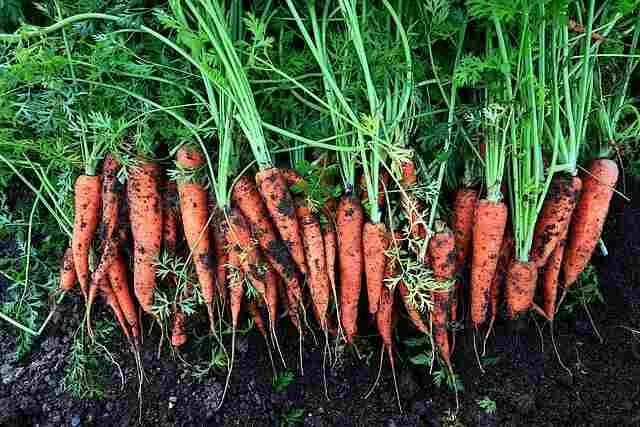
Rows and rows of endless carrots. That’s the dream, right? There can’t be any other way to grow this delicious traditional root staple, except that there is. And once you try container carrots for the first time, you might just find out it’s your favorite way to grow them.
Container carrots are not as tricky as you think. They don’t really differ that much from regular planting, which makes sense. A carrot is a carrot is a carrot, no matter how it’s grown. The crop still has a defined set of conditions and requirements for its success. Let’s touch on those requirements now before we dive in and create copious amounts of container carrots.
Like any root crop, carrot needs centre around spacing, depth, and soil type. Throw in light levels and nutrients with some moisture on the side, and we’ve got these guys covered.
Spacing for carrots is generally suggested to be one to four inches between each plant. That’s a pretty big range, especially if your pod is only 100 square inches of area or less. Even for the big varieties, I’ve found two inches to be quite fine. But even at that spacing, you can see why carrots are always thinned. But I’ve got a special way that I thin carrots later on in the life cycle, so don’t worry too much about spacing when you’re first planting.
Depth is super easy in a garden, as carrots will just grow down as far as they need. In a pot or container, there are obvious limitations, so 12 inches high is the recommended minimum.
For soil, though, this is where containers have a massive advantage and drainage too. Unlike your garden, where even if you amend heavily, 95 percent of the rest of the soil is already in place, containers, however, are 100 percent new fresh potting soil. So you can very easily cater to all of a carrot’s soil needs to get that perfect mix. And that would be a soil that’s loose, pH neutral, drains well, slightly sandy, rich but balanced in nutrients, and free of debris or clumping. That last one is key and often overlooked because those soil impediments can cause carrot forking and disappointing results. Make your own soil on the cheap using this tutorial here, or simply buy your favorite economical blend at your local nursery or home improvement store.
For light, either in the garden or in a container, carrots always need full sun. Six to eight hours is best if you want those leaves to capture enough energy to produce the epic tap roots that we’re after. Like we mentioned, carrots do like nutrients. They’re moderate feeders, no doubt, and enjoy a rich soil, but it has to be balanced. Excessive nitrogen is welcomed by many of our backyard crops, but carrots are not one of them. Too much of that famous macronutrient will give you huge lush tops, but poor roots that are often misshapen and hairy.
And finally, we get to look at moisture. With containers, especially these fabric grow bags here, drainage is rarely a problem. Because of this, though, your carrots can dry out faster than their garden counterparts, so weekly waterings may be necessary. Carrots need constant moisture without being swamped, so if you can stick to a schedule that suits your climate and the season that you’re growing in, container carrots are ideal.
So with that, let’s grab some containers, grow some epic carrots seed to harvest, so you can see just how easy it is to grow the most amazing crop of carrots in a container. You’ll need just three things. You’ll need the container, of course, usually a minimum of 5 gallons and at least 12 inches deep. Fabric, plastic, metal, or wood, they all work. Next, you’re going to need that organic potting soil. You can make your own if you’ve gone down that rabbit hole of self-sufficiency, or simply buy one designed for containers and potted plants. And finally, you’ll need the carrot seeds.
Carrot varieties are split up into four groups: Imperative, Chanting, Danvers, and Nantes. They’re all great and they can all be grown in containers. Certainly no limitations here. I do prefer to grow the Nantes type as I find them to be sweeter and generally more tasty.
Carrot seeds tend to take a long time to germinate, even when they’re in their ideal range of 65 to 85 degrees Fahrenheit. At the upper levels of temperature, the soil can dry out quickly, and as a shallow sown crop that’s planted less than a half inch deep, you run the risk of the seeds germinating but then drying out before being able to send out that taproot. I recommend adding a thin layer of straw mulch or grass clippings to prevent this.
Let’s go through and plant up a couple pots so I can show you the whole process, start to finish. Fill up your pots or containers the whole way, nearly to the top. Sprinkle in your carrot seeds liberally right on the surface. Don’t worry about spacing; we’ll get to that later. Cover with a skim coat of that same potting mix and an equal layer of mulch. Water the containers liberally. And that’s it, your carrots are planted.
The early takeaway here is carrots need to be planted near the surface. The ideal temperature range is quite mild to warm, and a thin mulch prevents the soil from drying out too much before those carrots get a chance to get established. Right on, there’s nothing left for us to do but wait, 7 to 21 days, in fact. That’s how long we’ve got until we start to see the carrots pop up.
Once your carrots have sprouted, and hopefully your germination rates were high, we can move on to the next step. Side note, however, if you’ve experienced poor germination results, even if you feel your conditions are more than ideal, look to the seeds. Carrot seeds have a notoriously short shelf life. So when in doubt, always buy the freshest seeds. Remember, carrot seeds are cheap, so lots of them, and we can thin them later, which coincidentally is our next task.
Okay, our carrots are growing and things look great. Time to thin, or maybe not. Let me explain. Traditionally, once your carrots are about two inches high, they’re thinned to an inch apart. Then, when they’ve doubled in height, they’re trimmed again to double that width. So, four inches high and two inches apart. This works perfectly well for garden carrots and their container counterparts, but hold on. Let’s get to that thinning trick that I talked about earlier. I like to let my carrots grow a little bit, usually to around six to seven inches high. And then what I do is harvest to thin. Let me show you what that means. What I do is I harvest the biggest carrots first. And in the process of enjoying delicious baby carrots, I’ll also thin the crop. As a result, it’s literally a win-win. So instead of pulling up hundreds of little baby carrot seedlings and tossing them away, this way I get to enjoy the carrot crop for longer and far more of it. Whichever way you do it, just note that thinning is a part of carrot life and there’s no avoiding it. All plants need space and carrots are no different.
Under normal conditions, garden or pot, carrot is a minimum of a 10-week crop. With a big enough pot and a quality soil, quite likely you can get away without supplemental fertilizing. If you do feed, however, you only need to do it once or twice, usually after each thinning. Just use a dilute organic liquid feed such as a seaweed or kelp extract. Low dose and top water it in. Easy stuff.
If you’ve used my method to thin, you’ll be enjoying fresh carrots after about six weeks and you’ll get to enjoy that harvest for about a month, maybe more depending on the variety and the time of year. Now, if you’re growing and thinning traditionally, the carrots can be picked for a final harvest at any time, really. Once the carrot roots turn their final color, they’re totally edible and so are their leaves. For a full mature harvest, however, you may have to wait up to two months or more. But don’t leave it too long as the crop will eventually turn woody and lose its sweetness. If the top to your carrots are poking out of the soil and are nearing an inch in diameter, the crop isn’t getting any bigger. It’s time to pull them up.
Container carrots are a unique crop in that just by sowing them in these independent living silos, we’ve tackled the trickiest parts of their growth habits: perfect drainage and an even more perfect soil consistency. Often make growing carrots in containers even easier than growing in the garden. Quite honestly, after a few seasons of growing carrots this way, it’s fast becoming my preferred way to do it. Hopefully, you’ll give container carrots a try and see the results for yourself.