One of the most fun and rewarding plants to grow for the home gardener starts its life not in a seed packet but in the produce section at your local grocery store. That’s right, we’re talking ginger, a culinary-producing juggernaut that’s used in kitchens around the world. And like everything else we grow, it’s ten times better when it’s fresh. Today, we’re going to go on a ginger journey from store-bought tubers to sprouting, to care and maintenance, all the way to harvest, leaving no stone unturned. And it’s actually pretty simple! Even if you’ve never grown anything in your life before, you can grow your own ginger root. It really feels like grocery store prices only seem to go one way: up. So, the more food that we can grow for ourselves, the better. And crops that grow indefinitely from just a part of themselves? Well, that’s just icing on the overview cake.
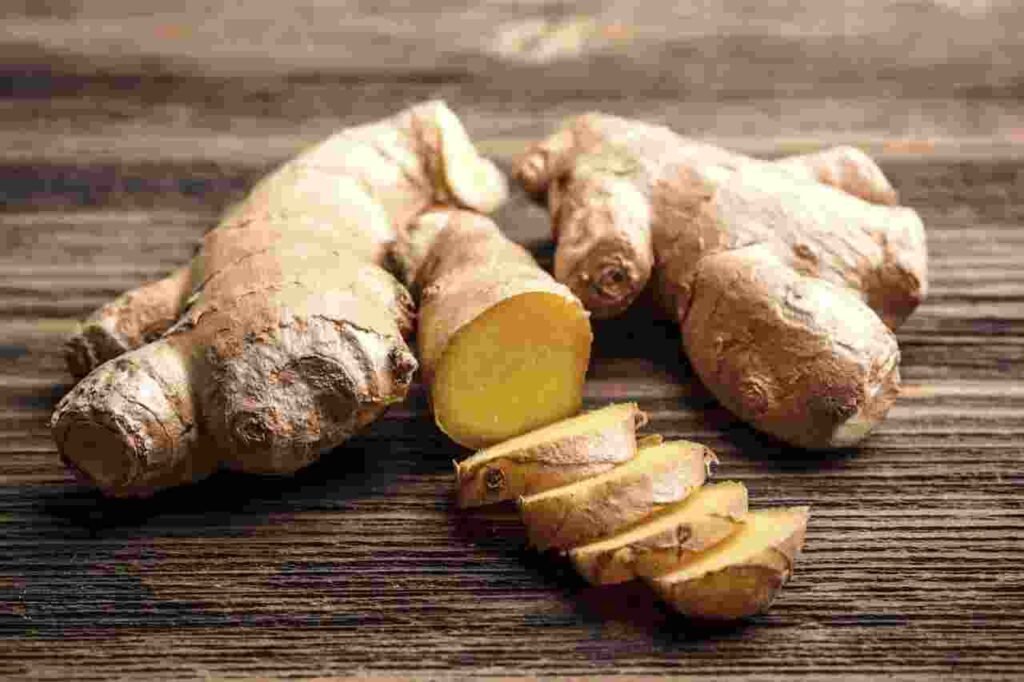
Choosing the Right Ginger From a casual observer’s perspective, all ginger must resemble the following: thin, dry skin with a yellow interior that is fragrant and fibrous. Although great for cooking, we require a particular age and quality of rhizome for sprouting and regrowing. Similar to the eyes that are found on potatoes, ginger sprouts from active growth sites on its outer skin. A brand-new ginger plant is represented by each active growing location. Therefore, when choosing ginger pieces to sprout, look for firm, somewhat smooth rhizomes that are still young. Avoid dried-out, squishy, or ragged pieces at all costs because getting those to sprout could be challenging, if not impossible.
Planting Your Ginger
It’s time to start planting now that we’ve selected all of our ginger.
Soaking the Rhizomes There are two ways to do this, and either one will result in a new harvest of ginger. However, regardless of how the ginger is planted, we must first soak the rhizomes overnight. In order to keep ginger and other crops from sprouting on the shelf, they are frequently sprayed and coated with growth retardants. We can remove that by first soaking the ginger pieces, allowing us to grow from them. Additionally, the active soaking appears to actually encourage the growth sites to activate, which is a bonus. Overnight, a bowl of regular tap water at room temperature will be sufficient. The good rhizomes will always sink because there is nothing overly fancy or complicated here.
Planting in Warm Climates Okay, now that our ginger has been completely submerged and soaked overnight, we can plant it immediately, particularly if you grow it in a greenhouse or live in a warm climate. The most straightforward method of growing ginger is in pots and containers, where 8 to 10 inches of soil typically suffices. However, due to its low, wide dimensions, you’ll need a pot with a lot of width. Grow bags made of fabric are absolutely ideal for this. Keep in mind that ginger grows horizontally underground, so depth is not very important to it. It’s all about having space to spread and grow. But don’t worry—this part is really simple. First, use a good potting mix to fill your pot or container almost to the top. If you are growing multiple pieces, place your ginger right on top, 4 to 6 inches apart. Cover them with the same potting mix, about an inch deep, after that. After giving them a thorough soak, we are finished planting our ginger. In the future, this is a legitimate and simple method for planting ginger if you can maintain a temperature above 75°F. It should sprout in two to four weeks if it is kept moist but not soggy.
Pre-sprouting Indoors Now, if you’re like me and it never gets warm enough to sprout ginger, or if you want to get a head start on the season because summer days are short, we need to pre-sprout our ginger indoors early. Let me demonstrate how easy it is. First things first: just like we did before, soak the ginger pieces overnight. I use the word “pieces” because I like to plant no more than three to five shoots on each rhizome in order to give the ginger enough room to grow. Make a shallow tray of about an inch of moist coconut fiber while your ginger is soaking. Peat moss works just as well, but it’s not as good for the environment. To keep the moisture consistent and even, I try to keep the coconut fiber as level as possible.
Care and Maintenance After the ginger has been soaked for about 24 hours, place the pieces on top of the coconut fiber, spaced about 1 to 2 inches apart. Yes, a tighter spacing than usual, but not so tight that they are actually on top of each other or even touching.
Temperature requirements: Cover them with an additional inch of moist coconut fiber and keep them between 80 and 85 degrees Fahrenheit. Your ginger will sprout shoots first in these warm, humid conditions within a week, then the roots about a week later. Now, depending on the weather, you can plant the ginger right away or keep it this way for about a month if it’s still too cold outside. It’s pretty straightforward, as I said.
Sunlight Needs
If you can, spend at least six hours a day in direct sunlight. Ginger, as previously stated, is entirely tropical. Those temperatures should never fall below 70°F. At best, cooler temperatures will have an effect on your harvest, and at worst, they will kill the plants.
Speaking of which, ginger can only be harvested as a young, skinless rhizome after approximately four months. It has the same flavor as the mature variety, but it is much smaller. When the foliage begins to fall off, your ginger will be ready for its final harvest if it is allowed to grow. That is your indication that it is time to select. Prepare to begin the process all over again in a few months by storing your ginger at room temperature. My opinion is that there is no other Asian spice quite like ginger. Home gardeners can grow a near infinite supply of one of the few crops that can regrow from just a piece of itself, eliminating the need to purchase additional rhizomes.
Conclusion
I hope that I have taught you everything I can about growing your own food at home today. I’ll see you soon, guys, and best of luck with your ginger.