Hey guys, today’s article is very straightforward. I’m going to make it as quick as possible, going right through the mistakes. Five seed starting mistakes that a lot of new people make. So stick around for that. All right, let’s get started.
Mistake number one
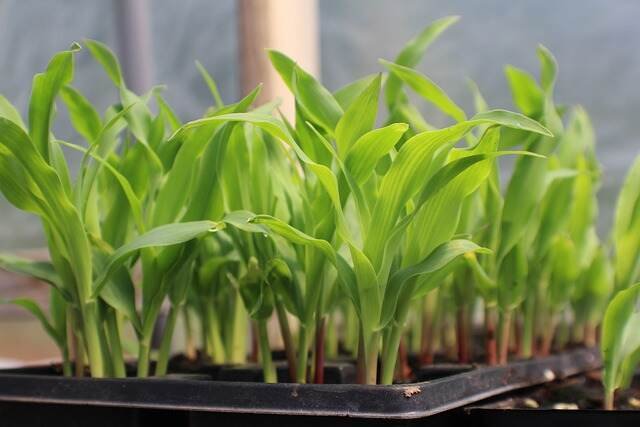
Mistake number one is starting your seeds too early. A lot of people make this mistake. I still do sometimes because you get the catalogs in the winter, you order your seeds, and you’re just so anxious for spring. You want to get started. The problem is you can’t rush the weather. And if your last frost date is 12 weeks from the day you start your seeds, you’re going to be babying seedlings turning into actual plants indoors. Now a lot of people have room to grow seedlings like on this tray, there’s several hundred seedlings. This table could not hold several hundred actual full-grown plants. And that’s exactly the problem you’re going to get into if you start too early. So, four to six weeks before your last frost date. If you don’t know your last frost date, I’ll put a link down below, or you can just Google your ZIP code, your city, and last frost date. Starting too early also, you’re not going to be able to grow these in these seed containers. So you’re going to have to pot up all the plants instead of just taking them out and putting them in the garden when the time is right.
Mistake number two
Mistake number two, heat. A lot of times, you know, I have nothing fancy here. It’s just in a garage. But in some climates, garages freeze or certainly, you know, don’t get to the heat level that is needed for some seedlings to germinate. Cool-season crops, you’re not going to really have an issue with. They like to be germinating, you know, between 50-60°F, unless you have a freezing garage, then you’re still going to have to warm that up a little bit. But certainly seeds like tomatoes, peppers, eggplant, cucumbers, all of the summer crops, but especially those, they need heat. Peppers, for sure, if you’re going to try to grow peppers indoors or start them indoors, they need heat. So you want to invest in a heat mat, preferably one that’s got a thermostat on it so you can choose your temperature. You want to choose around 75°F. And what that does is that just heats the potting soil just enough to give that seed its initiation, its start into the world, whereas if you didn’t have that, they could sit until your wherever you’re starting those seeds ends up producing those temperatures that it needs. Now, if you just had a couple of trays and you have an appliance like a refrigerator, a window sill over a radiator, most seeds don’t need light to germinate. So you can just put those in those locations that are warm until they start to sprout out. And then they will definitely need sunlight. And that brings us to number three.
Mistake number three
The third error individuals make is to need more light for their seedlings. Most importantly, there’s no develop light, no light that is just about as strong as the sun. You can grow them in a south-facing window that receives 6 to 8 hours of full direct sunlight per day. In the event that you have a nursery that is warmed relying upon your environment, it gets full sun, you can develop them in there. I don’t have both of those things. The majority, I believe, do not. Thus I need to settle on develop lights. Presently, that doesn’t need to be an unnerving recommendation. Any kind of light bulb can be used. It doesn’t make any difference in the event that it’s a long fluorescent cylinder, assuming that it’s a CFL, assuming they actually make those, Drove doesn’t make any difference the state of the bulb, and it most certainly doesn’t need to say develop light or made for plants. None of that has to be said in it. They will really charge you all the more only for those words. You can go to any light area, go to Home Terminal, Lowe’s, any place, and you’re only searching for the mark on the case to give you certain numbers. You’re searching for the words lumens and Kelvin. What’s more, you maintain that the number between lumens should be 500 to 2,000 lumens. That is the force of the light, the brilliance of the light. Also, you need 4,500 to 6,500 Kelvin. That is the temperature of the color, not the temperature it raises, but rather the temperature of the blue-to-red color spectrum. You’re needing to imitate a similar variety temperature as the sun. Presently, it could say for Kelvin, it could give you the numbers and afterward say sunshine. You’re searching for that. So as long as both of these numbers are where you maintain that it should be, you can involve them for beginning your seeds. I now have a high-quality grow light here. That is a piece unique. That is all the more impressive. Now, the other kinds of bulbs will work if you get them with the lumen and Kelvin numbers. However, in order to get the amount of light your plants need, you need a light bulb that is at least 2 inches tall. So you can either, assuming your light brings down and raises, you can raise the light alongside the development of the plants. Or on the other hand you can set them up on blocks, sheets, whatever, so they’re near the light and afterward bring down those things, take out blocks or anything that to bring down the plate as the plants get taller. However, you generally need the plants around 2 creeps from that light source. With proficient develop lights like this, their power is much more grounded than any of those different sorts of bulbs. They’re more costly, however they likewise light a more extensive region. So you need to sort out how much region you need, the number of those different kinds of bulbs you would have to cover that region and check whether this doesn’t seem OK. I’ll put a connection to this one down underneath so you essentially look at it. Not supported, coincidentally.
Mistake number four
The fourth misstep you can make is to child your plants in here such a lot of that when they head outside, they’re tossed into something else entirely of setting and they will perhaps not kick the bucket, however they will be hampered. Presently, I haven’t had it on during our talking here since it’s clearly and old and creaky. All things considered, in light of the fact that that is what they do in nature. At the point when those plants shake to and fro and twist in the breeze, it is reinforcing their stems. It is making the plant be stronger. So when you put it outside, it will do a ton better than a plant that has been totally in this actually supported climate. That is a significant issue. Also, you don’t must have anything unique, any swaying fan, regardless of whether it’s on this is how things have been one will function.
Mistake number five
The fifth mix-up before we get to the reward, the fifth slip-up is watering your seedlings from beneath. Presently, there’s a great deal of justification for this. You would rather not have the highest point of your dirt in your compartments continually soggy. It causes parasitic infections like damping off. It draws in growth gnats to lay their eggs in there, and that causes a completely separate issue, numerous issues, least of which is the disturbance of having gnats zooming around all over the place. It additionally keeps the dampness off of the leaves. You don’t need leaves wet in an indoor space. The fan actually helps with both of those things. I ought to have referenced that. It gets dry the leaves and it dries out the outer layer of the dirt. So that fan sort of performs twofold responsibility. The roots grow downward rather than stay on the surface when wettening from below and making sure that the lowest part of each cell is wet. Presently, you can do this by setting your seed plate in a plate that doesn’t have openings in it that you can load up with water. Put it in there when you see it drenched to the outer layer of the dirt, take it out. You don’t need them sitting in that. They will suffocate. I’ve become hopelessly enamored with these seed plate. They’re self-watering plate from Grounds-keeper Supply. Under this, there is a water reservoir. There’s a stand that keeps the plate raised out of the water. However at that point they have a wicking mat that absorbs the water, disperses it across this board, and permits the lower part of the plate to absorb it. So they generally get the ideal measure of water. Again, these are unsponsored, but they have changed my life. They’re not modest, however they are worth the effort. They are major areas of strength for exceptionally. These will keep going for quite a long time. Good, the reward. We’ve endured four to about a month and a half sprouting the seeds, dealing with them, getting them to the legitimate size, and our weather conditions outside is prepared. Ices are no more. Now is the ideal time to move them outside. In any case, you need to do it gradually, with a specific goal in mind canceled solidifying them. On the off chance that you simply take these, even with the fan, they’ve been in a protected climate, entirely different than what you will place them into the sun, even with this develop light here. The sun is far more extraordinary than they’ve had ever in their life. Additionally, they must literally grow a thicker skin. In order to protect themselves, they must sort of develop their sunscreen. They are unable to simply enter a full day of sunshine. Additionally, they may not be accustomed to the varying temperatures that you will experience outdoors at this time of year. So there’s two methods for getting it done. There’s the customary way and there’s the apathetic way. So the conventional way is consistently you take them outside for a drawn out timeframe. Consistently gets somewhat longer. Begin with an hour in the shade, bring them back in. Following day, two hours in the shade, bring them back in. The following day, perhaps two hours to three hours in halfway sun, bring them back in. Bring them back in the following day, after three to four hours in partial sunlight. You can bring them back inside the following day after leaving them outside for five or six hours in full sunlight. And afterward from that point onward, it’s around a 7-day process where you will at last have them familiar with every one of the various factors outside. And afterward they can now be left outside and established in the nursery. Indeed, Let’s get real here for a minute, I think a many individuals have occupations. Thus on the off chance that you’re not home each day, the entire day to deal with this cycle, there is a sluggish man’s way or perhaps I would agree that a more brilliant method for making it happen. Look on your forthcoming 7-day figure and figure out a time of opportunity that you have three days straight of cloudy climate. At the point when that’s what you see, that is your 3-day window. You’re going to take them outside, where the sun would normally shine the most, but the cloud cover will shield them. Three entire long periods of cloudy climate, that is all you want to do. Therefore, when you leave for work, put them out and when you get home, bring them in. Certainly don’t leave them out for the time being. Also, after that 3-day time frame, they will be prepared to establish out in the nursery. Presently, I referenced growth gnats rapidly. Fungus gnats are the culprits if you’ve ever observed tiny, black insects hovering over your indoor plants. Furthermore, they can truly make a great deal of harm the root foundation of the plant. In addition, they’re really irritating.